
Why Getting the Diagnosis Right Matters First
Moisture damage is one of the most commonly misdiagnosed home problems. A landlord or contractor who treats condensation as rising damp - or patches over a slow plumbing leak - may charge significantly for work that leaves the actual cause untouched. The result is recurring damage, wasted money, and eroded trust in the repairs process.
The four main moisture sources - condensation, penetrating damp, rising damp, and plumbing leaks - each require a different response. Some can be managed with ventilation improvements or minor maintenance. Others genuinely require licensed professionals and structural work. Knowing which you're dealing with before spending anything is the most valuable first step you can take.
This guide walks through a practical diagnostic process any homeowner or renter can follow, from initial observation to targeted inspection. It also clarifies when professional assessment is necessary - and why that's not something to skip. For broader context on keeping your home functional and well-maintained, the Home Maintenance hub covers a wide range of related topics.
Use a Moisture Meter Before You Do Anything Else
Inexpensive pin-type moisture meters (available at most hardware stores) give you an objective baseline reading rather than relying on visual guesswork. Take readings at the affected area and compare them to dry wall sections of the same material. A reading significantly above the baseline confirms active moisture - and helps you track whether it's improving or worsening over time.
What You'll Need Before You Start
Diagnosing moisture doesn't require specialist equipment - but a few basic tools make the process more reliable and the findings easier to document. Gather the following before beginning your inspection:
What you will need
Pin-type moisture meter
Measures moisture content in walls, floors, and ceilings to confirm active dampness and establish a baseline.
Flashlight or headlamp
Illuminates roof spaces, under-sink areas, and dark wall cavities during inspection.
Aluminum foil and waterproof tape
Used in the foil test to determine whether moisture is coming from inside (condensation) or outside (penetration or leak).
Notepad or phone camera
Record the location, pattern, and extent of moisture damage for comparison over time or to share with a professional.
Don't Skip Professional Assessment for Structural Damp
Rising damp and penetrating damp that have affected wall plaster, timber joists, or floor structures can compromise the integrity of your home. Before attempting any remediation beyond surface-level fixes, consult a qualified building surveyor or damp specialist. Unpermitted or incorrect repairs can mask ongoing damage and create larger problems down the line.
Step-by-Step: How to Diagnose the Source
Map the Affected Area
Before reaching for any tools, carefully observe and document the moisture problem. Note its exact location, shape, and height on the wall or ceiling. Ask these questions:
- Is the damp patch at low level (below 1 meter) or higher up?
- Does it appear on an external wall, internal wall, or ceiling?
- Is it confined to one room or spread across multiple areas?
- Does it appear after rain, after cooking or showering, or regardless of weather?
The pattern alone narrows the field significantly. Low-level patches on external walls suggest rising damp; patches appearing only after heavy rain point to penetrating damp or a roof issue; patches that come and go after steamy activities are almost always condensation.
Perform the Aluminum Foil Test
This simple, no-cost test distinguishes condensation from moisture passing through the wall structure. It won't identify a plumbing leak, but it rules one major cause in or out quickly.
- Dry the affected surface as much as possible with a cloth.
- Cut a piece of aluminum foil roughly 12 inches square.
- Tape all four edges securely to the wall using waterproof tape, creating an airtight seal.
- Leave it in place for 24-48 hours.
- Remove the foil and check both sides.
Moisture on the room-facing side of the foil indicates condensation - water vapor from inside the room is condensing on the cool wall surface. Moisture on the wall-facing side indicates moisture is moving through the wall from outside, pointing to penetrating damp or a structural issue.
Check for the Hallmarks of Each Moisture Type
Use the foil test result together with visual clues to match the problem to a category:
- Condensation
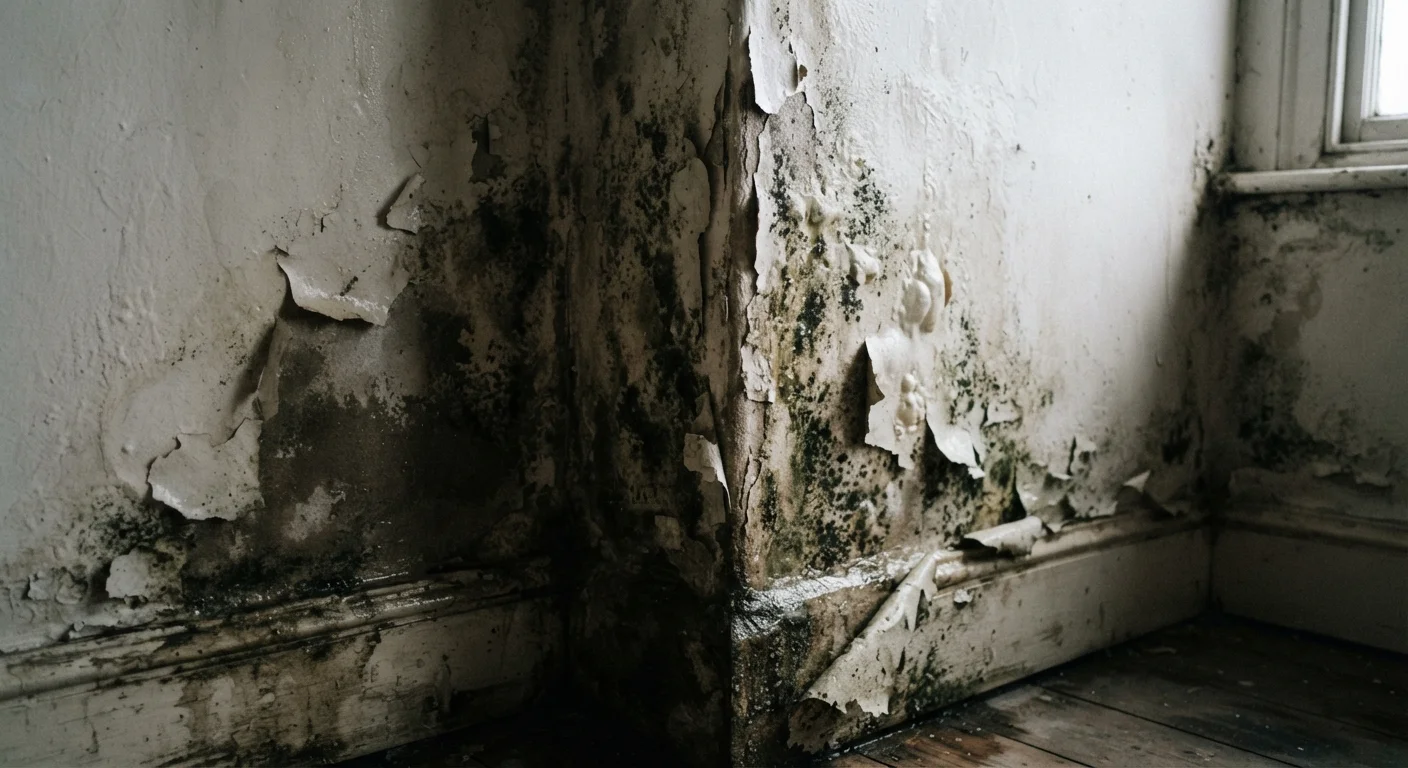
- Moisture on the foil's room-facing side; black mold appears in patches near window frames, on cold external walls, or in corners with poor airflow; problem worsens in cold months; visible water droplets on windows or tiles.
- Penetrating damp
- Moisture on the foil's wall-facing side; staining correlates with rainfall; patches appear on upper sections of external walls or beneath windows; cracked render, damaged pointing, or blocked gutters visible on the external wall.
- Rising damp
- Tidemark stain - a horizontal line usually below 1 meter - on external or solid-floor walls; salting (white crystalline deposits) on plaster surface; damage consistent across the base of an entire wall regardless of weather.
- Plumbing leak
- Moisture appears suddenly rather than seasonally; located near pipework, under sinks, behind appliances, or on ceilings below a bathroom; possible sound of dripping; water may be discolored.
Inspect External and Structural Contributing Factors
Once you have a working hypothesis, do a targeted external inspection to confirm or challenge it:
- Gutters and downpipes: Overflow or blockage can saturate walls. Look for green streaking or moss on brickwork beneath joints.
- Pointing and render: Cracked or eroded mortar between bricks allows rain to penetrate. Look along window reveals and at wall junctions.
- Roof and flashings: Missing tiles, cracked lead flashings around chimneys or dormers, and damaged ridge tiles are common entry points. View from ground level using binoculars if the roof is not safely accessible.
- Ground level: Soil or paving built up against the wall above the damp-proof course (DPC) can bridge it, allowing moisture to rise.
This check is an observational one - do not attempt to access roofs or high areas without appropriate fall protection and experience. When in doubt, engage a qualified roofer or surveyor.
Determine Your Next Action Based on Cause
Your diagnosis should drive the response. Here's how to match findings to next steps:
| Cause | DIY-Appropriate? | Recommended Action |
|---|---|---|
| Condensation | Usually yes | Improve ventilation (extractor fans, trickle vents, dehumidifier); address cold bridges at window reveals |
| Penetrating damp | Minor defects only | Repair pointing, clear gutters, reseal window frames yourself; larger structural repairs need a contractor |
| Rising damp | No | Consult a qualified damp surveyor - DPC replacement or injection is a regulated, specialist task |
| Plumbing leak | Depends on access | Simple isolation and accessible joint repairs may be DIY; concealed pipe leaks require a licensed plumber |
For guidance on how moisture-related repairs fit into your broader maintenance priorities, see our overview of home maintenance on a tight budget.
Common Mistakes That Lead to Wasted Repairs
Even careful homeowners fall into a few recurring traps when dealing with moisture. Being aware of these helps you avoid unnecessary costs:
- Treating the symptom, not the source: Applying new plaster or paint over a damp patch without identifying and fixing the cause simply delays the problem's return - usually within one or two seasons.
- Assuming the worst: Not every dark patch signals structural rising damp. The majority of residential moisture complaints in well-maintained homes trace back to condensation, which is manageable and inexpensive to address.
- Acting too quickly after a single event: One isolated damp patch following an unusually heavy storm may be a one-off incident, not a chronic problem. Monitor and document before committing to repairs.
- Skipping the external check: Internal moisture almost always has an external entry point or contributing factor. An internal-only inspection leaves half the picture unseen.
Mold Poses Real Health Risks
Prolonged exposure to mold spores - common in moisture-damaged homes - can aggravate respiratory conditions and allergies. If you find significant mold growth (typically larger than a 10-square-inch patch), consider wearing an N95 mask when investigating the area and consult a professional remediation service rather than disturbing it yourself.